Detecting the Blue Angels with Splunk Storm
Filed Under Geek, Raspberry Pi, SF Bay Area | 2013-01-20, 14:00

For those that live in San Francisco (and the surrounding area), you know what Fleet Week sounds like. For those that don’t live around here, it sounds like incredibly loud low flying fighter jets buzzing the city for a couple hours each day for almost a week. Specifically it’s usually the Blue Angels practicing for their air show. Every year, Twitter and Facebook light up with either love or hate for these incredible technological marvels of human achievement built in the pursuit of an even greater military killing force. Regardless of your politics, they’re loud.
I’ve been working at Splunk on our cloud-based product, Splunk Storm, and have been finding new and different things to log and analyze with the service we’ve built. Shortly before Fleet Week 2012, Greg Albrecht came up with the idea of monitoring the roar of jet engines. He’s got a great write up of the whole side-project: Blue Angels Flyover Detection Using Splunk.
I used a Raspberry Pi with a Zoom H2 Recorder that can be used as a USB microphone. I left it setup by the window with it streaming data to our shared free project on Splunk Storm. We wondered at first whether we’d be able to reliably detect the jets since we had no way of testing before Fleet Week. Surprised that none of my friends owned fighter jets? Yeah, me too. But as you can see from the screenshots on Greg’s page of reports generated with Splunk, they weres pretty easy to detect.

FireHero 3: Christmas Special
Filed Under Art, Fire, Fire Art, Geek, Raspberry Pi | 2013-01-19, 18:46
I know the holidays are almost over (we still have my birthday!) but I had to share this video of Chris Marion’s latest revision of Fire Hero 3. I’ve been chatting with Chris off an on over the last 2 years about fire art, and how Interpretive Arson/Ardent Heavy Industries has gone about building and running our stuff safely and legally at events.
He goes into great detail on how he built a lot of the system which includes six flame effects that react to guitar playing and two 100ft flame cannons for even more fire. All the plumbing and accumulators are controlled by an Arduino Mega and a RaspberryPi with a custom built server and communication protocol (written in python).
The Python host software is made up of a series of algorithms designed to perform intelligent chord-detection, as well as detect single notes and place them appropriately. The software memorizes all the chord progressions of a particular song as the guitarist plays in order to ensure consistent output for each chord.
The system is designed specifically for live music performances. I’m hoping it gets booked for a show nearby so I can check it out in person.
Raspberry PI: Add Multiple WiFi Access Points
Filed Under Raspberry Pi | 2012-09-22, 09:41
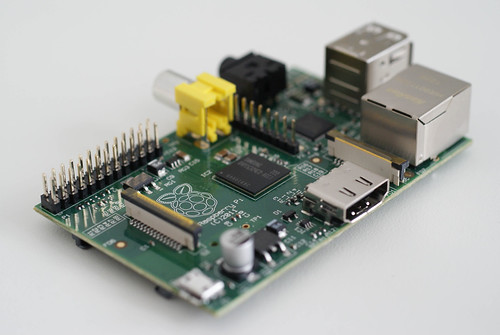
I don’t know about you, but I can’t remember the last time I had to configure wireless access from the commandline on a Linux machine. When I bought my Raspberry Pi, I also bought an Edimax EW-7811Un Wireless Adaptor. It’s super tiny, and provides wireless access to the Raspberry PI without adding anything bulky hanging off. It uses the very common Realtek RTL8188CUS chip, so it’s supported on Linux. Installing it was a piece of cake with this info and script. Huge thanks to MrEngman for this! (UPDATE: They say this wifi chip is supported with the new Raspberry Pi Debian image, so no need to run the script even!)
Once I had the wireless adapter up and running I realized I wanted it to be able to connect to any of the 3 wireless access points in our house. Turns out it’s really easy to setup your Raspberry Pi to connect to more than one wireless access points, but I had a bit of trouble finding a good how-to for it. Also, I’m sure I’ll forget these steps in due time. So here’s the painfully simple steps both for you and future me:
Edit your network interfaces with the command: sudo nano /etc/network/interfaces
Put the following in interfaces:
auto lo
iface lo inet loopback
iface eth0 inet dhcp
allow-hotplug wlan0
auto wlan0
iface wlan0 inet dhcp
pre-up wpa_supplicant -Dwext -i wlan0 -c /etc/wpa_supplicant.conf -B
Then generate your psk for each of your access points with: wpa_passphrase <ssid> <passphrase>
The output will show what your generated psk is. Copy this, we’ll put this in the next file.
Edit your config for wpa_supplicant: sudo nano /etc/wpa_supplicant.conf
Put the following in wpa_supplicant.conf:
ctrl_interface=/var/run/wpa_supplicant
#ap_scan=2

network={
       ssid="your ssid #1"
       scan_ssid=1
       proto=WPA RSN
       key_mgmt=WPA-PSK
       pairwise=CCMP TKIP
       group=CCMP TKIP
       psk=the psk you generated above
}

network={
       ssid="your ssid #2"
       scan_ssid=1
       proto=WPA RSN
       key_mgmt=WPA-PSK
       pairwise=CCMP TKIP
       group=CCMP TKIP
       psk=another psk you generated
}
That should be all you need. Now when you plug-in and boot your Raspberry Pi it should connect to whatever access point is available that is supplied in the wpa_supplicant.conf. To check and see which one you’re using at any given time, just use the command iwconfig. Other handy linux commands for wireless stuff like checking signal strength.
-
Subscribe

Subscribe to my feed -
Twitter
-
My Other Stuff
-
Find It
-
Sites I Like
-
Archives
- August 2014
- May 2014
- April 2014
- February 2014
- November 2013
- October 2013
- September 2013
- July 2013
- June 2013
- May 2013
- January 2013
- September 2012
- August 2012
- July 2012
- May 2012
- March 2012
- February 2012
- September 2011
- June 2011
- May 2011
- March 2011
- December 2010
- June 2010
- April 2010
- March 2010
- February 2010
- January 2010
- December 2009
- November 2009
- October 2009
- September 2009
- August 2009
- July 2009
- June 2009
- May 2009
- April 2009
- March 2009
- February 2009
- January 2009
- December 2008
- November 2008
- October 2008
- September 2008
- August 2008
- July 2008
- June 2008
- May 2008
- April 2008
- March 2008
- February 2008
- January 2008
- December 2007
- November 2007
- October 2007
- September 2007
- August 2007
- July 2007
- June 2007
- May 2007
- April 2007
- March 2007
- February 2007
- November 2006
- October 2006